When joints on a brick or stone wall begin to deteriorate, it’s time to get them repaired–ASAP! Yes, deteriorated joints make your home or building look neglected though that’s not what the rush is all about. This deterioration can prematurely age your wall’s integrity, which might cause it to collapse. Simply fixing the surface of joints isn’t enough. The building might look as good as new, however–as mentioned–its integrity is at risk. Ensuring your masonry is in top shape will avoid you some major headaches. Here, we’ve broken down all you need to know regarding brick or stone repointing to ensure your home looks great and but also stands the test of time!
What is brick repointing?
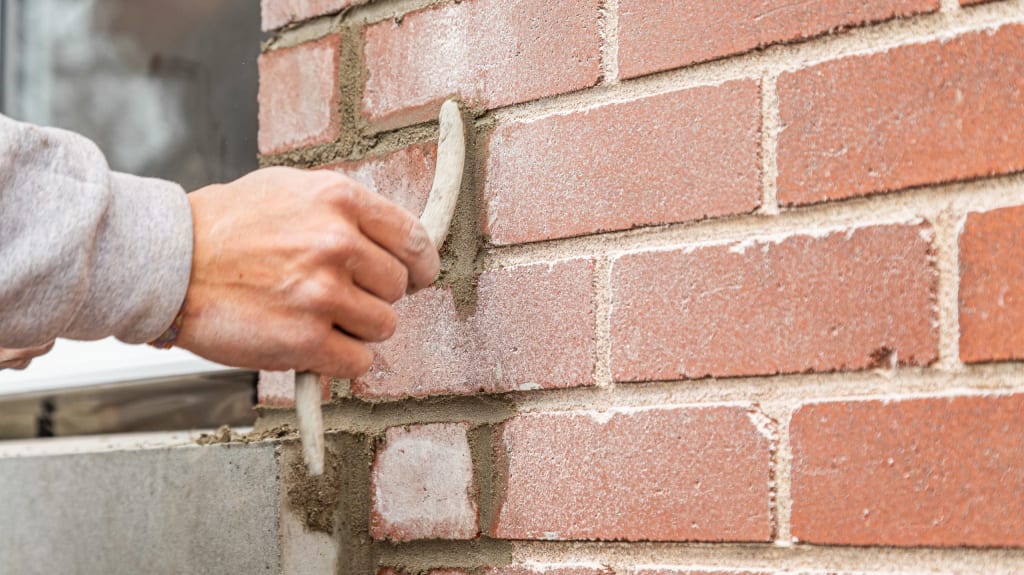
Brick repointing consists in removing a portion of the deteriorated mortar and redoing the joints with new mortar. Repointing halts any further water infiltration through the mortar and behind the brick wall–which avoids any mortar crumbling or bulging brick and saves the wall (or any part of it) from collapsing. Once repointing is done, the wall looks as good as new and is officially protected from any mishaps Mother Nature might have in store.
When is it time to repair brick or stone joints?
If the mortar joints around the bricks or stones are starting to show signs of wear and tear (crumbling, cracking, etc.), you’re better off repairing them as soon as possible as any damages done to the joints will only worsen over time. Even more so as water infiltrates through the mortar or behind the wall. Any water that gets through will most likely be subject to multiple freeze-thaw cycles, which will, in turn, create the same phenomenon that causes potholes on the road and result in bowing (bulging) brick. When this happens, portions of the wall can start to detach from the rest of the structure and even put people’s safety at risk. Putting off repairs will only worsen the situation and increase repair costs as time passes.

How often does brick need to be repointed?
If you’re wondering when to repoint brick, the good news is that it doesn’t need to happen that often. Barring any unexpected damage, bricks and mortar that have been professionally installed should only need to be repointed every 50 years or so. In some cases, you won’t need to consider repointing brick for up to 100 years.
That said, don’t let repointing be your one and only solution for brick repair. Issues such as spalling bricks or cracks from a shifting foundation are just a few signs that indicate larger repairs may be necessary.
How to repair run-down mortar joints
You can repair mortar joints yourself if you like. Though, you should be fully aware of what you’re getting yourself into! You’ll need some specific tools, a quality mortar mix, knowledge on how to complete the job and a lot of patience!
Tools you will need
Learning how to repoint brick on your own can be a daunting task. You not only need to learn how to repoint a brick wall but also how to remove mortar from bricks for repointing. Additionally, you should do some research on what type of mortar for repointing brick is best for your situation. To take on a project of this nature yourself, making sure you have the right tools is also key to your success. You’ll require tools for mixing fresh mortar, for scraping away excess mortar and tools for your own safety as well. Here is a brief list of some of the items you’ll want to have on hand:
Scaffolding for providing easy access to hard-to-reach areas
Electric grinder
Hammer and a chisel for removing original mortar
Stiff brush
Trowel
Brick jointer
Electric drill with a mixer
Container for mixing cement mortar
Safety equipment including goggles, dust masks and gloves
Joint raker
A water source
If there are multiple sections where your mortar has started to deteriorate, you’ll need to remove it and replace it with new mortar. This means you’ll multiple days aside just to fix a single side of the building.
Steps to brick repointing
Safety and planning Before diving into this kind of job, you’ll need to do some planning, buy all necessary equipment, request authorization for easement onto your neighbours’ property if need be, protect the work site, install scaffolds and wall anchors, etc. You’ll also need to consider the safety of passersby and ensure you don’t overload scaffolds if you begin removing large parts of the brick wall.
Prep You’ll first need to remove any ruined mortar with an electric grinder or a hammer and chisel. According to governmental bodies, before repointing any joints, the mortar joints will need to be scraped flat to a depth of 2 to 2 1/2 times the thickness of the joint. The mortar needs to be removed from both adjacent masonry surfaces, as well as any mortar that is no longer adhering to the surface. This essentially means that about one inch of mortar (or at least ¾ inch) would need to be removed. You’ll then pick a repointing mortar formula that is airtight. If ever the mortar is damaged at a greater depth, it is best to remove the brick entirely, clean it and reinstall it.
Mortar When applying the mortar, you’ll need to humidify the brick’s surface to ensure that the mortar doesn’t lose any of its water by capillarity on contact with a dry brick surface. This will also guaranty that the mortar adheres properly to the surface on which it is being applied. It’s important to properly apply pressure and compact the mortar in the slits. Each application should be a thin layer and the next layer should be applied only when the first hardens (but isn’t completely dry!). No additives, such as glue, are to be added to the mortar’s formula.
Joint sealing Once the application process is done, it’s time to add the finishing touches to the joints. You can choose any style you’d like (concave, V-shaped, etc.).
NOTE Flat joints are more fragile as they don’t repel water as efficiently.
Drying and cleaning All that’s left to do is let the mortar dry and then clean it. Drying should take about 3 days. You can then proceed to clean the joints for proper finishing.
NOTE If the entirety of the brick wall has had a waterproofing solution applied to it, it might be difficult to get the mortar to adhere to the surface. Should you be in this situation and/or do not want to undertake this renovation project, we can refer you up to 3 qualified masonry contractors that will bid for the opportunity to do the masonry work you need to get done.
At what temperatures can masonry joints be redone?
The bricks or stones that will be getting worked on need to be warmer than 5 °C and cooler than 25 °C, 24 hours before and after applying the mortar. Of course, it is possible to get the work done in temperatures lower than 5 °C but it requires you to protect the surface with a protective cloth and install heating at the foot of the section you are working on to maintain proper temperature. As you can see, this solution is less than ideal as it requires more complex preparations. In any case, you should avoid repointing if rainfall is in the forecast.
How much does brick repointing cost?
Repointing brick is priced at approximately $25 per square foot. For a duplex, repointing one wall measuring 34 feet x 20 feet would amount to roughly $17,000. However, the expense for a commercial building could be significantly more. Factors such as material cost, quality, and wall size all contribute to the final cost.
For a more detailed breakdown of costs regarding getting masonry work done, take a look at our Cost of Masonry Work article.

Thinking of renovating?
Repairing a brick wall–beware of con artists
We often see representatives going door-to-door offering to provide their masonry repair services to homeowners whose homes have deteriorating mortar joints. However, in most cases, these companies will only do repairs at the surface–which will only last two to three years.
Get my quotesRestoring heritage masonry

If your home or building is in a historic part of town, you’ll want to preserve the architectural heritage of the building. You want to keep it unique and increase its resale value but still keep its original structure in place. Some masonry companies are specialized in heritage home restoration.
When working on these projects, masons tend to have to work with other professionals–most often with architects and engineers. We’ll gladly help you put together a team of professionals for a successful heritage restoration.
Alternatives to repointing brick
When dealing with damaged brick walls, repointing isn’t the sole solution. In certain cases, tuckpointing might be a more suitable approach than repointing. So, how do they differ? Both techniques aim to restore and strengthen the joints between bricks. However, they employ slightly different methods, and each process will produce mildly different results.
So, what does repointing brick mean? As you know, repointing brick mortar consists of removing old mortar with a hammer and chisel, then adding new layers of mortar to reinforce the strength of your brick wall. Tuckpointing, on the other hand, focuses more heavily on the look of your bricks–using two different coloured mortars (one that is the same colour as the brick itself) to give the look of very fine joints between your bricks.
In summary, brick repointing is best when actual repairs are required while tuckpointing is best when you simply want to spruce up the look of your home’s exterior.
Aesthetics benefits
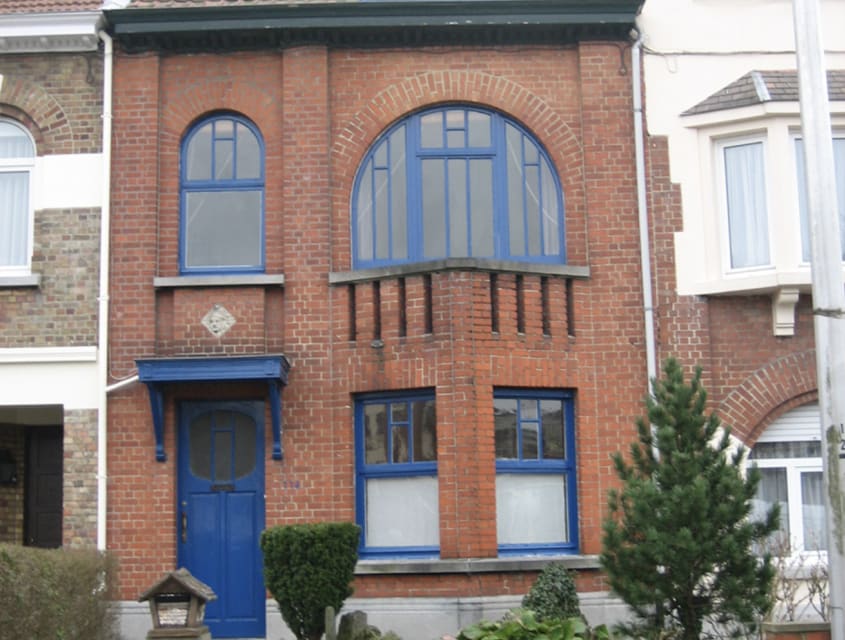
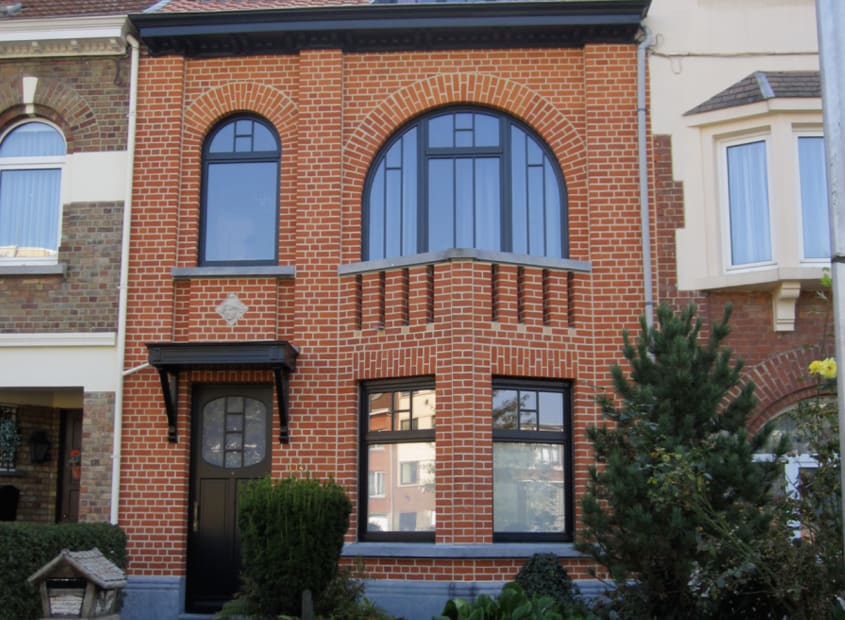
Repointing the joints between bricks can be crucial to your safety. But it also offers visual appeal. Just take a look at these renovations before and after photos:


Tips for the proper brick repointing
For repairs that will last the test of time, a great deal of mortar will need to be removed. All depending on the condition your wall is in, it might be better to remove each brick, clean them up and reinstall them. In either case, you’ll be giving a second life to your brick or stone wall.
How to find the best brick repointing masonry contractors
If you know people that have gotten their masonry repointed or any other masonry work done, you can surely ask them to refer you to the contractors they worked with. Regardless of whether your friends, colleagues or family members speak highly of them, we still suggest you ask them any question you may have, as well as do a thorough verification of their business before hiring them.
We’ll gladly refer you to Verified Contractors if ever you don’t feel like going through an auditing process. We’ve already audited hundreds of contractors. We can refer up to 3 masonry contractors that have our seal of approval. They’ll compete against one another so that you can make an informed decision and pick the best contractor in terms of price, quality of work and competence. Ready to get started? Let us help you repair your brick wall today!
